The previous posts (Part 1, Part 2, Part3 and Part 4) have shown how to create a bare-bones SvelteKit app that was versioned and deployed automatically to Azure Static Web Apps. In this last section we'll look at another aspect that's most likely required when creating real-world applications - modularising, namely creating an independent package that exposes front-end functionality and using it in the main app.
To make the example more realistic, we'll export both a Svelte component and a TypeScript class from the independent package. Please note that most open-source packages are available through npm. The thing about npm though is that only open-source packages are hosted for free. To create a private package, you need to sign up for paid npm. The free alternative is to use your private packages and import them from a local path.
The steps we'll take are:
- Creat a new folder, lib, and initialise a new SvelteKit library project there: npm create svelte@latest .
- Choose "Library skeleton project"
- Yes, using TypeScript syntax
- Yes for ESLint, Prettier, Playwright and Vitest
- Install dependencies: npm install
- Create a new Svelte component that the library will export: CustomProgressBar.svelte
- Create a new TypeScript file with a class that will also be exported by the package.
- Re-export the Svelte component and the class from index.js
- Build the library by running npm run build. Notice that the /package folder has been generated
- Change the name of library in its package.json file (the one in the /lib folder, not the copy from /package) and call it "frontend-helpers". Run the build again.
- In the main app, SvelteKitChatRoom, install the new package using the relative path: npm i .\lib\package\ -D. Notice that the package was imported with a relative path.
- We can now use the component in our initial project:
import {CustomProgressBar} from "frontend-helpers";
<CustomProgressBar progress={34} />
Note
There may be some issues that Vite is complaining about locally.
- Problem #1: the component can't be rendered with SSR.
- Solution: add a new +page.ts file in the routes folder and disable SSR. The library is built for the browser anyway, since we use the global document object and we display a Svelte component.
export const prerender = false;
export const ssr = false;
- Problem #2: The request url "C:\work\SvelteKitChatRoom\lib\package\index.js" is outside of Vite serving allow list.
- Solution: Edit vite.config.ts and allow more files using the fs property of the server object (see screenshot)
Changes to the build pipeline
Of course, now that we've added a project dependency whose output folder (/package) is not versioned, we need to change the build pipeline in Azure DevOps to build this project before we build the frontend. See last screenshot below with the changes required.
Screenshots for all steps
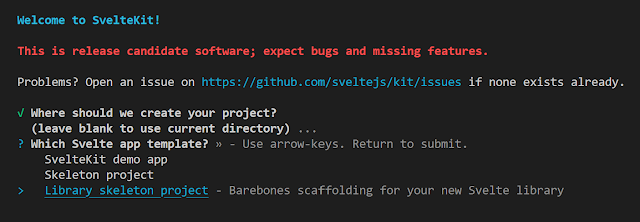 |
| Step 1 - Initialise a new Library skeleton project |
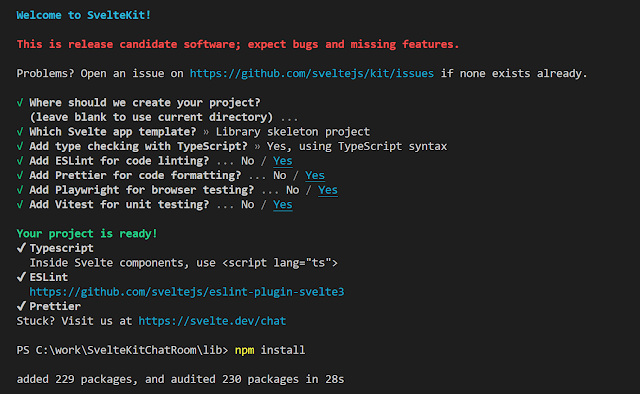 |
| Step 2 - see scaffolding summary and run npm install |
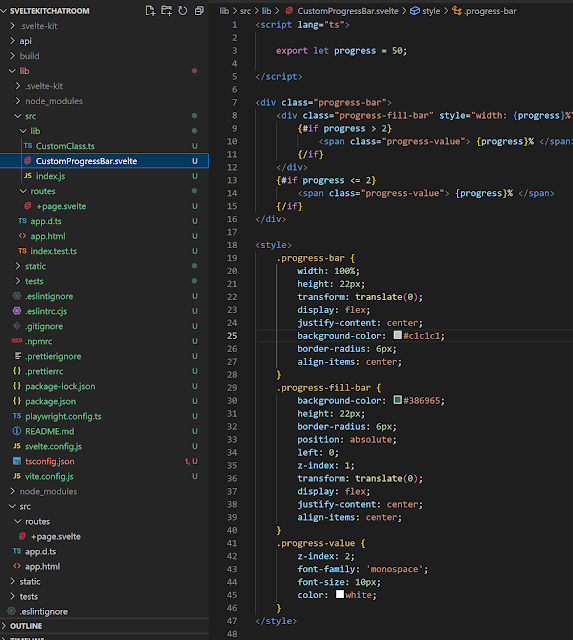 |
| Step 3 - create a Svelte component that shows a progress bar |
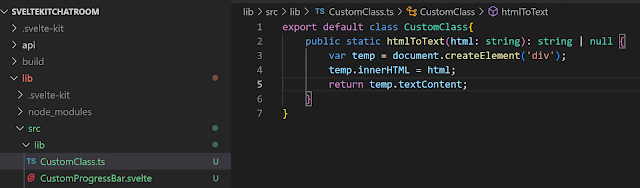 |
| Step 4 - create a TypeScript class - the only function converts html to plaintext |
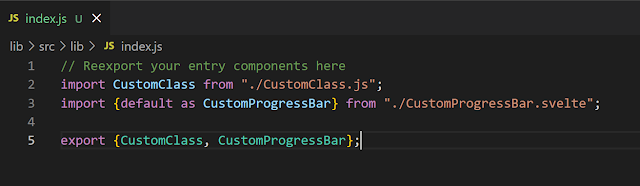 |
| Step 5 - reexport component and class from the index.js |
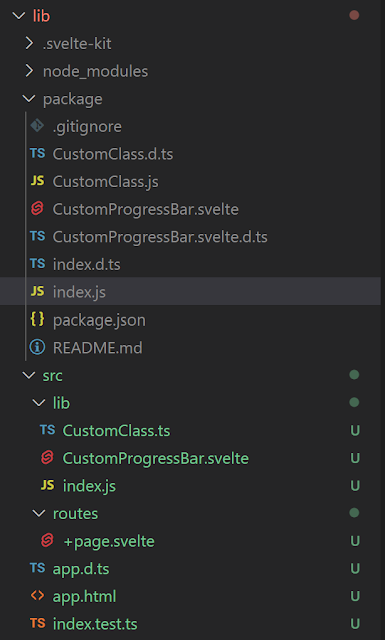 |
| Step 6 - /package folder created after build |
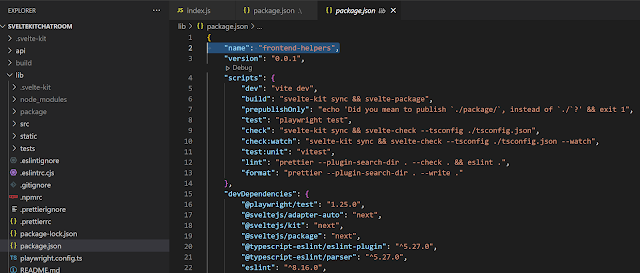 |
| Step 7 - change name of newly developed package |
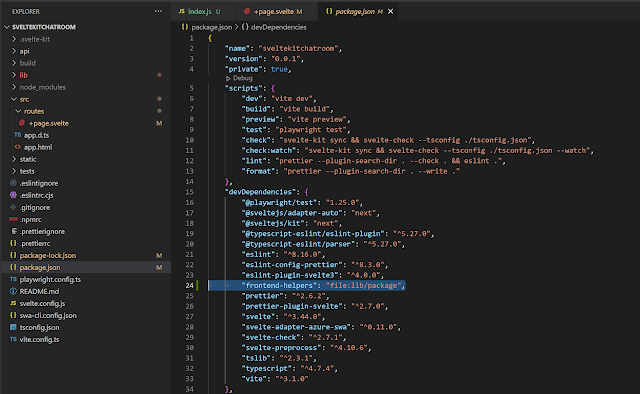 |
Step 8 - package imported in main app with relative path
|
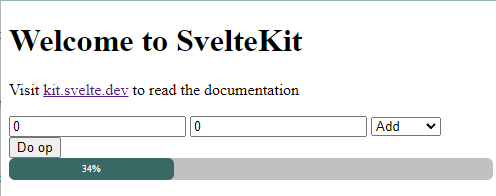 |
| Step 9 - Use the component from package in main app |
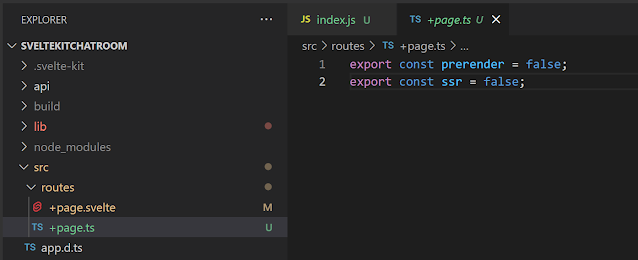 |
| Problem #1 fix |
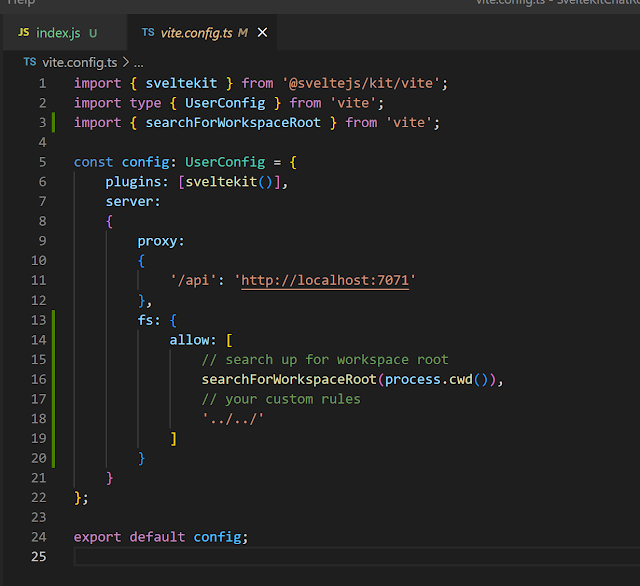 |
Problem #2 fix
|
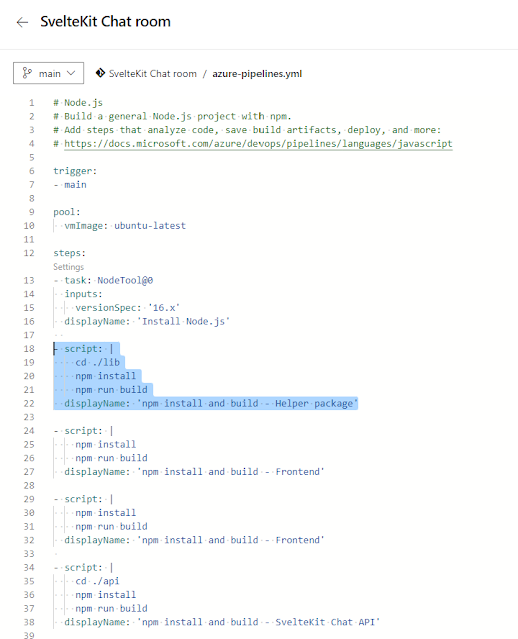 |
| Changes to the build pipeline |


Comments
Post a Comment