Now that the SvelteKit web app from Part 1 is up and running locally, let's also add an API.
The API is the only way to perform server-specific operations like accessing a database.
Although they are "static", Azure Static Web Apps actually support API through Azure Functions. Many programming languages can be used to write Azure Functions but we'll stick to TypeScript. Of course, we need to be mindful that, although it's still JavaScript or TypeScript, the code will be running on Node.js, not in a browser, so you have different globals, no window, document, etc.
We'll look more into that in a separate post. For now, we'll implement some simple functionality and extend it once we work more on the API and add separate modules.
What we want to achieve for now is to add an API and access it from the Frontend.
The steps are:
- Initialize a Node.js Azure Function with func init > node > typescript
- Create a new Function - func new > HTTP trigger > use name testapi. Notice that this created:
- Folder testapi with index.ts and function.json that points to "../dist/testapi/index.js"
- The pacakge.json configuration with the build, watch, starts and other scripts inside
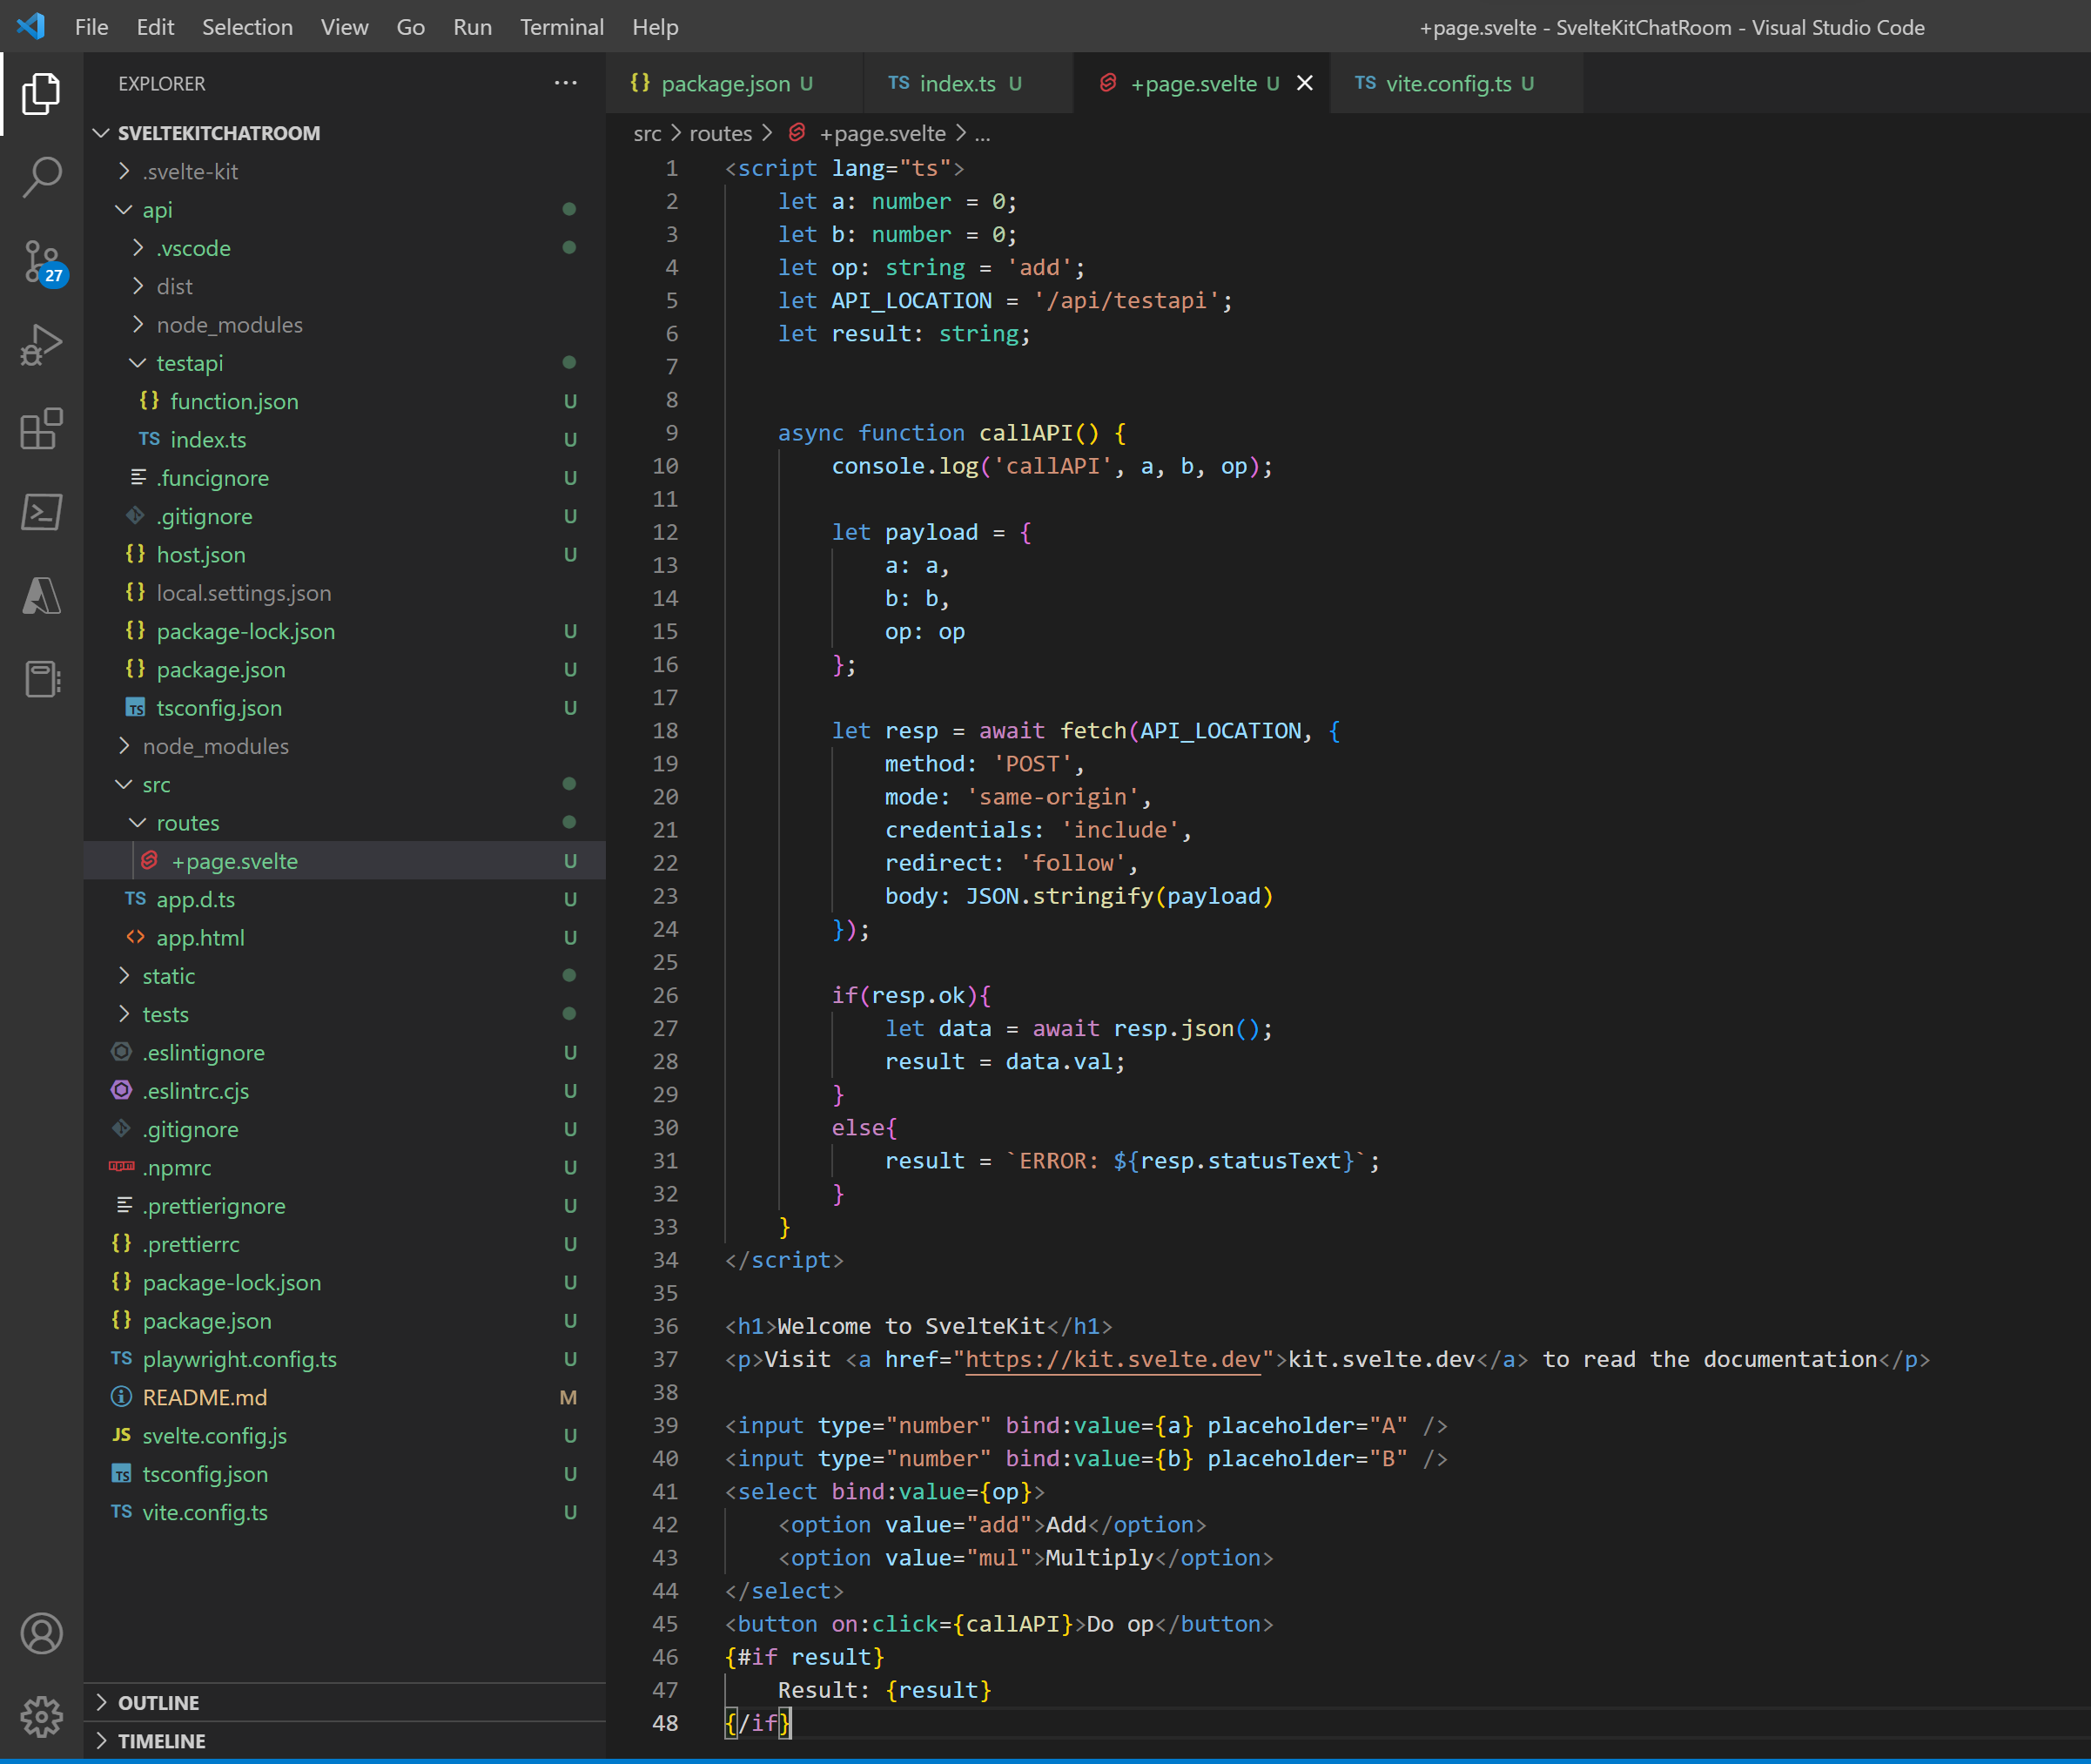
- Let's add some code and test the function in isolation. We'll just process POST requests with three parameters, op, a and b, perform the arythmetic operation and return a result. The purpose here is to show how to deal with input and output of a function, not to focus on the actual calculations.
- Run the function locally:
- install the node modules (npm intall), build (npm run build)
- Func start and use POSTMAN to call the function
- Notice the output of the operation in the terminal
- Use the function as api: Call the api from the frontend. When using func start, the function is running locally on port 7071. In production, it should be running from the relative location /api.
- Let's add some front-end code that calls the API. We'll real the two values using input elements, make the call with a button and display the result
- Check all code into Azure DevOps. Notice that all the scaffolding from SvelteKit and Azure Functions was smart enough to include .gitignore files so we don't check in node_module folders with dependencies or the build folders.
Screenshots of steps
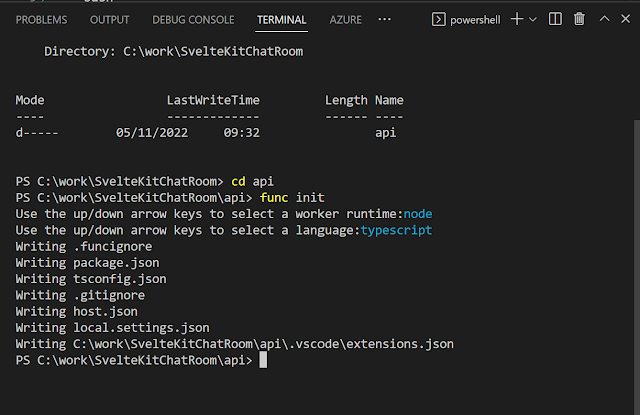 |
| Step 1 - initialise the functions project in the api folder |
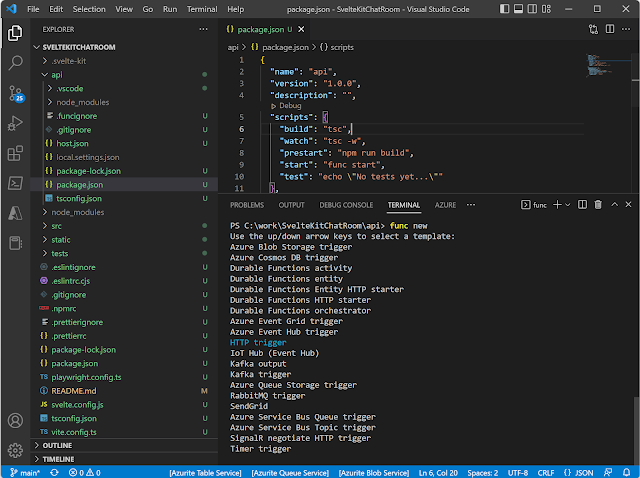 |
Step 2 - add a new HTTP triggered function
|
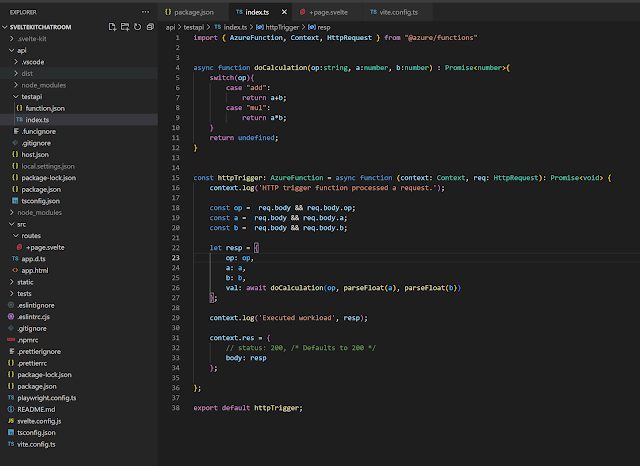 |
| Step 3 - Adding code in the API |
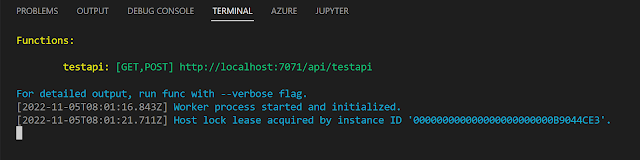 |
| Step 4 - run the function locally |
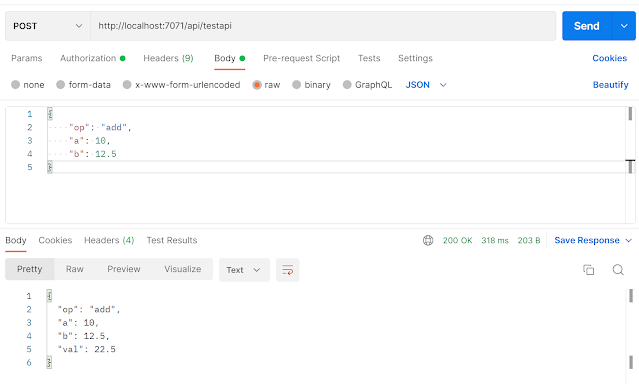 |
Step 4 - test function using Postman
|
 |
| Step 4 - See function output in the terminal |
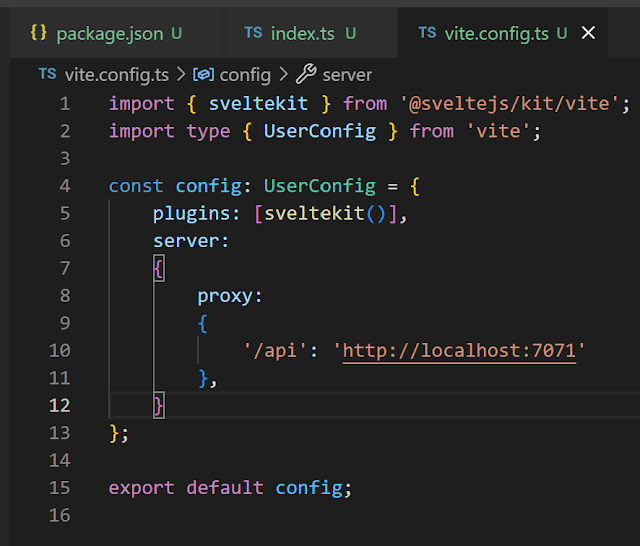 |
| Step 5 - Changing vite.config so the API is accessible through /api |
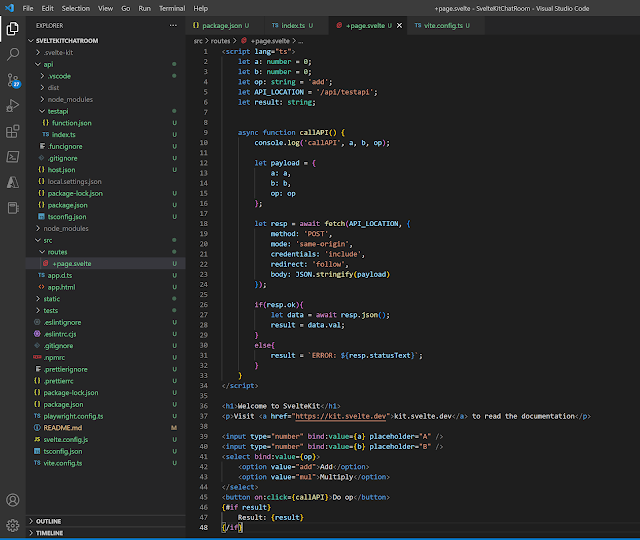 |
| Step 6 - the Svelte front-end that calls the API |
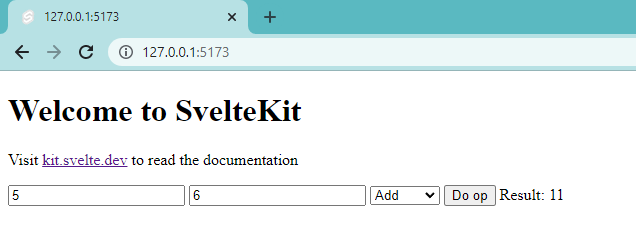 |
| Step 6 - the changed UI |
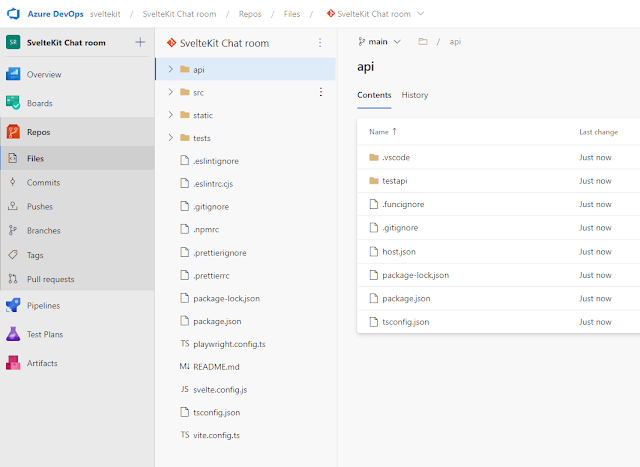 |
| Step 7 - the code is now checked into Azure DevOps |
In the next post we'll do the following:
- Make sure the output from SvelteKit is a static webapp using an adaptor
- Configure the Azure DevOps pipelines for deployment.
- Create Azure resources
- Test the CI/CD pipeline


Comments
Post a Comment