In the previous posts (Part 1, Part 2 and Part3), we tested the web app locally, configured the build to produce a static web app and checked the code into Azure DevOps. What we want to do next is to deploy the web app to Azure.
The end-to-end flow of the code from the local machine to the actual Azure Web App is illustrated in the diagram below.
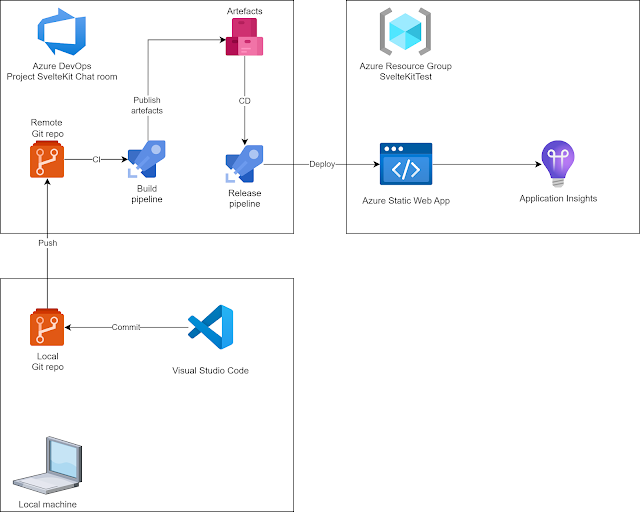 |
| Development and deployment process |
We've pushed the code into the remote Git repo hosted on Azure DevOps. Now, we need to create Azure resources and configure the build and release pipelines.
I will use a new resource group called SvelteKitTest. The steps taken are:
- Create a new resource of type Static Web App from the Azure Marketplace
- In the configuration pane, chose the parent resource group and a name for the app: sveltekitchat. Choose a relevant region (close to target audience) and, under "Deployment details" choose "Other". We will manage build and deployment using Azure DevOps pipelines.
- After the Static Web App is created, from the Overview pane chose "Manage deployment token" and make a note of it. It will be used when configuring the Release pipeline
- In Azure DevOps, go to Pipelines-Pipelines and create a new pipeline.
- Select Azure Repos Git in the next step (Where is your code?)
- Select the remote repository
- Start from the Node.js template
- Add extra steps to build the the API (see screenshot for this step)
- Run the pipeline
- Once the build completes, it produces an artefact.
- If we open this artefact and look at its contents, we can see that it contains both the /api folder and the /build folder for the static web app.
- Go to Pipelines - Release and create a new release pipeline. Use Empty job as the template
- Select Add an artifact and chose the build pipeline as the Source and Latest ad Default version
- Edit Stage 1 and add a task - search for "static" and you'll find the task "Deploy Azure Static Web App"
- Make the following changes in the task's properties:
- Working directory - choose the root folder of the artefact - $(System.DefaultWorkingDirectory)/_SvelteKit Chat room/drop
- App location: build/static
- Api location: api
- Api build command: npm install
- Config file location: build
- Skip app build
- Verbose
- Azure Static Web Apps api token - the one copied at step 3.
- Select Agent job and make sure the Agent Specification matches our build agent, in our case "ubuntu-latest"
- Save the release pipeline and select Create release.
- Once the release completes, the Static Web App will be available in Azure and the API functions should also be detected. We can browse the app using the automatically generated URL.
- The build pipeline normally has the continuous integration trigger enabled by default, so a build runs after every commit. To enable continuous deployment, edit the trigger of the release pipeline and enable it so every successful build triggers a release. Of course, release to more "official" environments may need to be manually approved, but that can be done by adding more stages in the release pipeline.
Screenshots for each step
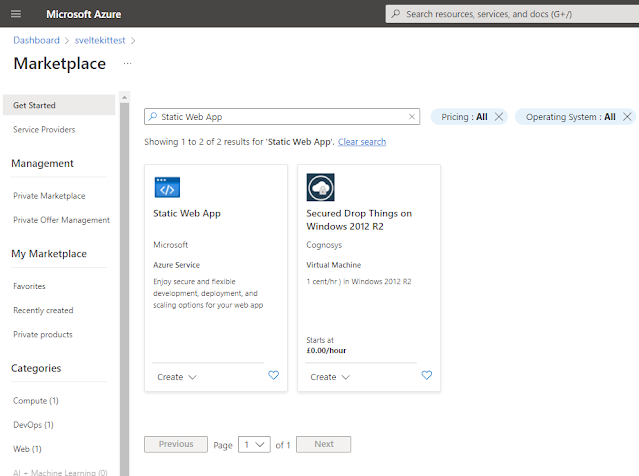 |
| Step 1 - Create the Static Web App in Azure |
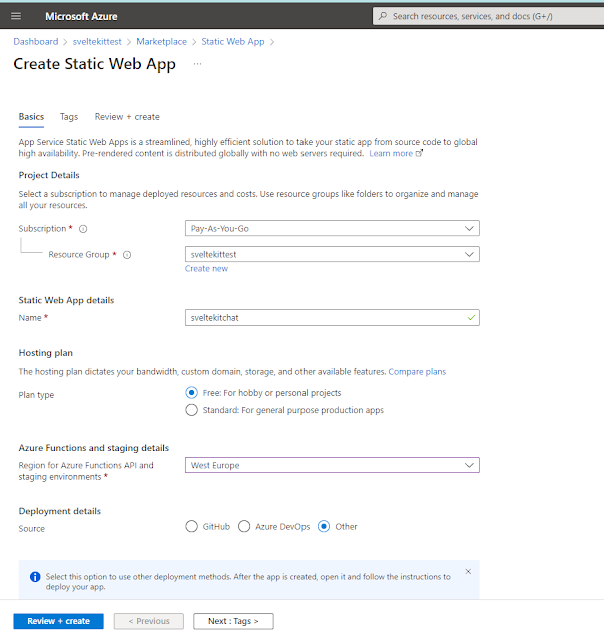 |
| Step 2 - Creating static web app in Azure |
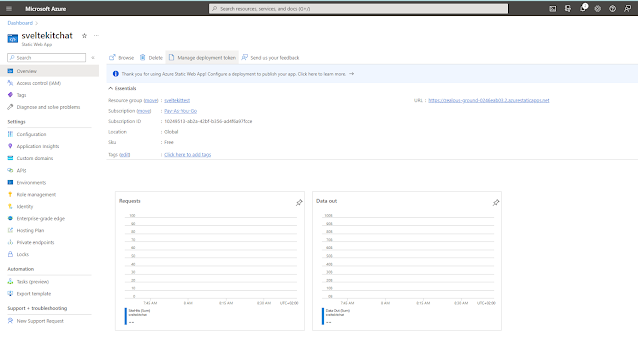 |
| Step 3 - Finding the deployment token |
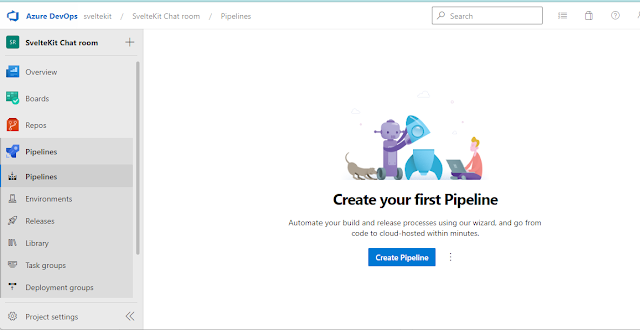 |
| Step 4 - Creating a build pipeline |
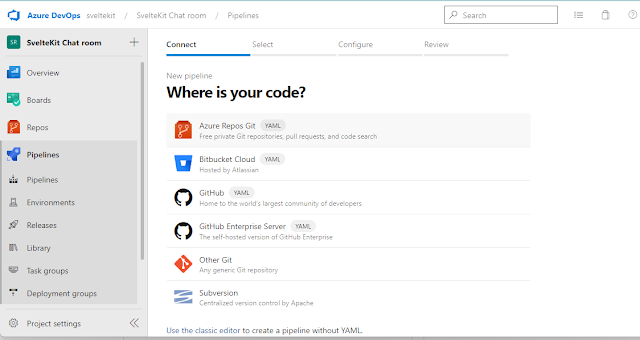 |
| Step 5 |
 |
| Step 6 - Chosing the Git repo as source for the build pipeline |
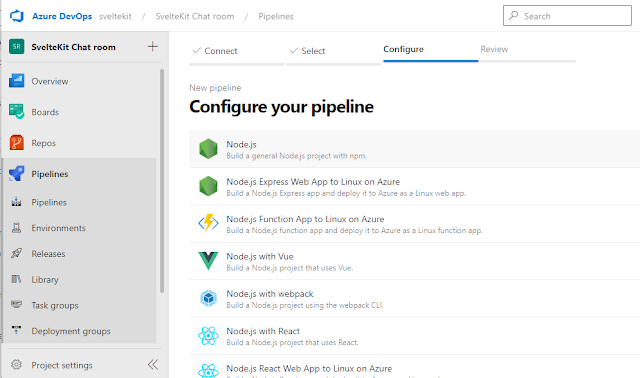 |
| Step 7 - New Node.js build pipeline |
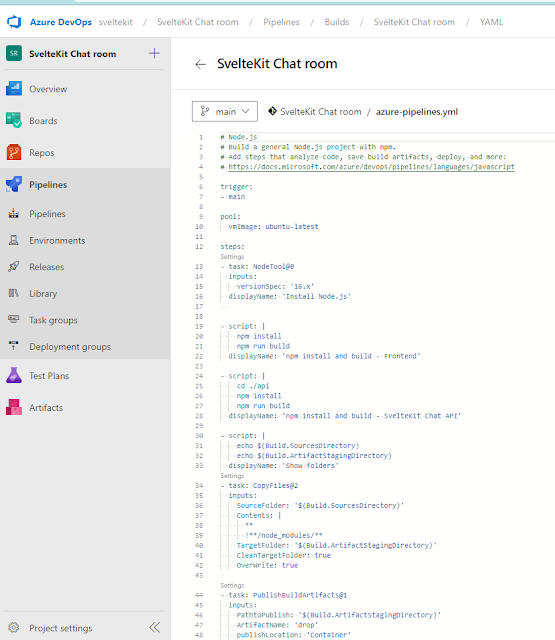 |
| Step 8 - YAML for the build pipeline |
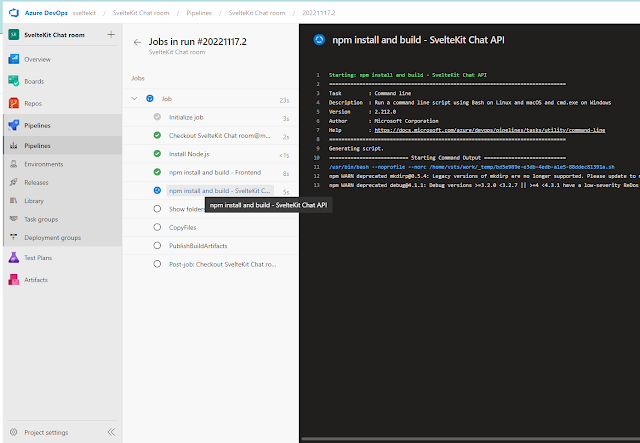 |
| Step 9 - Build underway |
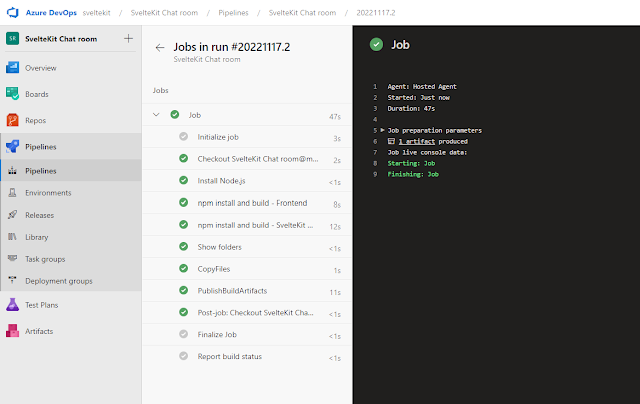 |
| Step 10 - Build completed |
 |
| Step 11 - Inspecting the artefact published by the build pipeline |
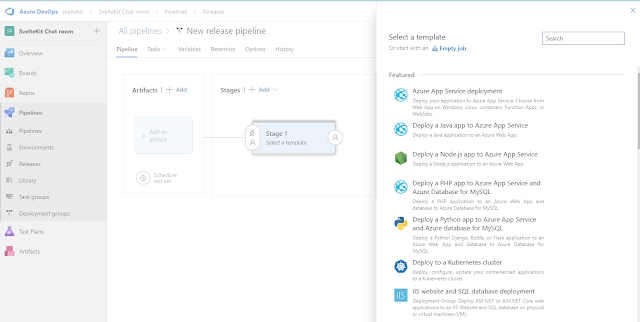 |
| Step 12 - Creating a new release pipeline - Empty job |
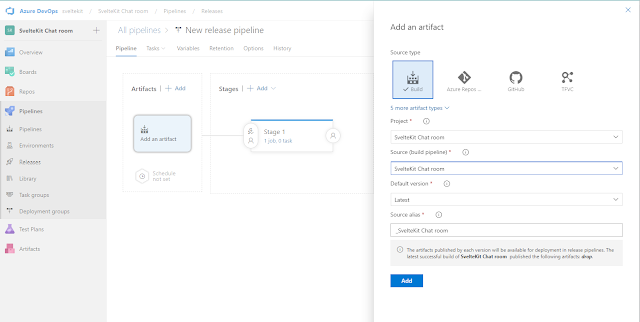 |
| Step 13 - Adding the artefact produced by the build |
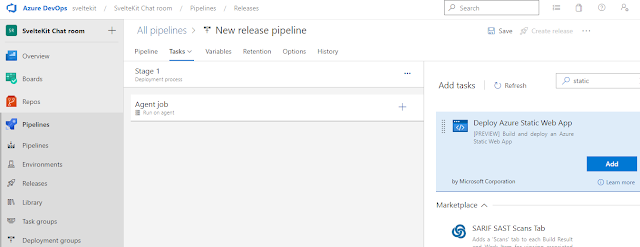 |
| Step 14 - Adding the deployment task |
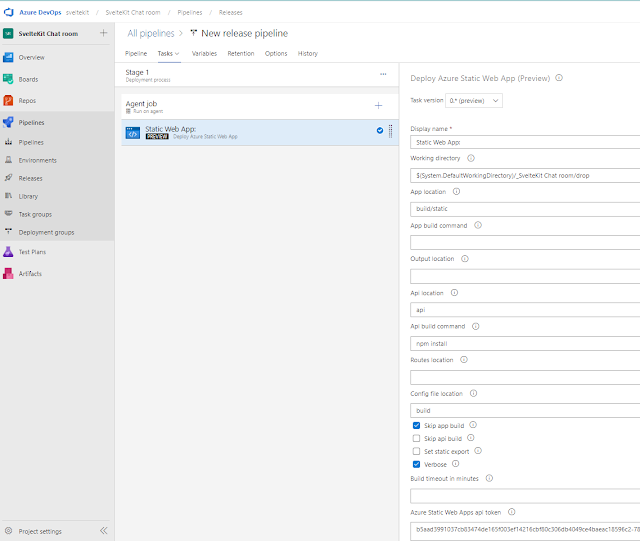 |
| Step 15 - Configuring what we deploy |
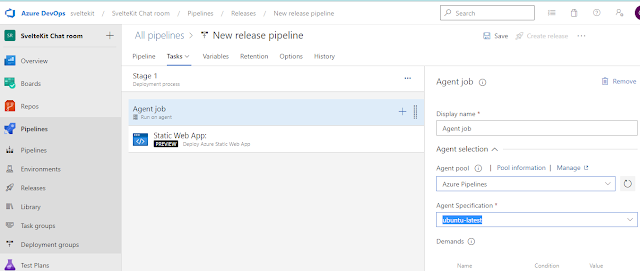 |
| Step 16 - Making sure the release runs on Ubuntu, just like the build |
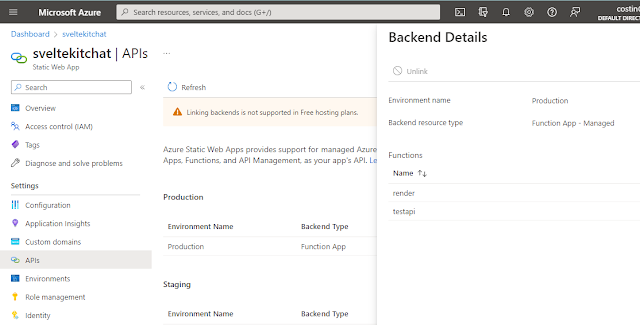 |
| Step 18 - API functions visible in Azure |
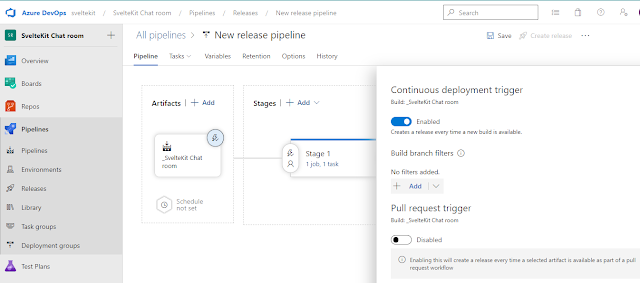 |
| Step 19 - Enable continuous deployment |


Comments
Post a Comment